- Workshop Equipment
- Epoxy resin
Epoxy resin
Epoxy resins have long been used as adhesives in woodworking. Relatively new, however, is the use as a casting resin to make table tops and other furniture components. We offer an extensive range of Woodresin brand epoxy resins. You will also find Woodresin's colour pastes, concentrates, pigments and other effect agents for use with the resins as well as the necessary accessories for processing in our range.


What are epoxy resins used for?
Epoxy resin belongs to the group of synthetic resins (other representatives are, for example, the polyester resins found in many lacquers). The various epoxy resins are used on an industrial scale for very many applications, but for the woodworker only a few specific uses are of interest. They can be applied in thin layers as a surface agent, used to make small decorative elements for furniture in suitable moulds, or used to make larger components by casting. Such components include tabletops made from solid planks (often with tree edges, cracks and other imperfections) by pouring them with epoxy or casting them in a mould. Provided with a suitable table frame, you thus obtain a so-called rivertable.
Resin and hardener
Epoxy resins are usually used as two-component systems: The resin is mixed with a hardener so that a thermosetting plastic is produced after curing. Unlike other manufacturers, Woodresin always uses the same epoxy resin to enable the casting of different layer thicknesses. The maximum layer thickness that can be achieved is determined by the use of different hardeners.
In general, epoxy resins should have certain properties for use in conjunction with wood. They should be crystal clear for most applications. Especially for outdoor use, they must also be sufficiently UV-stable to protect against yellowing and cracking. For medium and large layer thicknesses, they should have good deaeration properties so that no air bubbles show in the finished workpiece. In addition to these general requirements, some resins have properties that make them particularly suitable for certain purposes: There are resins that are food-safe and those that are particularly heat-resistant compared to normal resins. All Woodresin products meet the basic requirements to a particular degree, and the range includes both food-safe and heat-resistant resins.
Processing epoxy resin
In principle, the processing of epoxy resins in the casting process is not particularly difficult from a technical point of view and also requires only a small amount of basic equipment in terms of tools and working materials. However, close attention to a few factors is essential, and the quality of the finished workpiece depends on the care taken during casting and the final surface treatment.
- Mixing the resin and hardener, casting the part and curing the resin will only produce good results within a relatively narrow temperature range: The material and the ambient air should preferably have temperatures around 20° Celsius. Lower temperatures lead to delays in curing (up to permanent liquid retention of the mixture), higher temperatures accelerate curing, but can also very quickly lead to 'boiling up' of the resin. This is a strong heating due to the chemical reaction between resin and hardener, which leads to bubble formation, discolouration and volume increase of the mixture and therefore an unusable result.
- In the presence of water, undesirable reactions of the resin also occur. All tools and equipment should therefore not only be clean but also dry. For the same reason, the relative humidity in the working room should not exceed 65%.
- The mixing ratio of resin and hardener should always correspond exactly to the manufacturer's specifications. Even small deviations can lead to problems. It should be noted that resin and hardener can have different specific weights. The mixing ratio is therefore determined with the scale according to weight proportions and not with a measuring cup.
- The mixing itself should be done thoroughly and calmly to reduce the formation of air bubbles in the resin. After mixing, the resin should be poured into a fresh vessel because residues can form on the bottom and walls of the mixing vessel where the resin and hardener are not sufficiently mixed.
- The mould into which it is poured must be precisely constructed. All joints must be sealed and the inside of the mould must be provided with a release agent to allow stripping.
- When casting , the maximum layer thickness of the resin mixture used must be closely observed. Too thick a layer can lead to 'boiling' of the resin (see above) and a spoilt workpiece.
- After stripping and complete curing of the resin, the surface is usually sanded and polished (if you do not prefer a matt surface). As usual, you work your way up from a coarse grit to a fine or very fine grit. To avoid streaking, it is advisable to sand dry. The more work you put into grinding and polishing, the higher the surface quality of the workpiece will be.
Work tools
The production of a rivertable or other workpieces from cast epoxy resin requires increased care and a certain amount of effort in some work steps, but the necessary tools and work equipment are usually either already available in a normal wood workshop or can be acquired with little investment.
- As with many other chemical substances, epoxy resins also pose health risks. You should therefore protect yourself with the appropriate personal protective equipment when working with these resins: Respiratory and eye protection and protective gloves. Simple latex disposable gloves are not sufficient because they are permeable to some components of the resin mixture. Nitrile gloves should be used instead. Respiratory protection is especially necessary when dry sanding epoxy because the sanding dust may contain carcinogenic and/or toxic substances.
- For measuring and mixing hardener and resin, you need measuring cups, stirring vessels and stirring rods or a drill with a stirring attachment.
- If the resin is not to be poured, tools such as a brush or roller, spatula or squeegee are needed for application.
- For the production of larger moulds, apart from the construction material (usually coated chipboard) , a cordless drill, screws, sealing tape and release agent are needed.
- The final surface treatment is done with sandpaper (wet and/or dry), sanding block or sander, polishing paste and polishing wheel for the drill. For the final cleaning, use either simple soapy water or special cleaning agents.
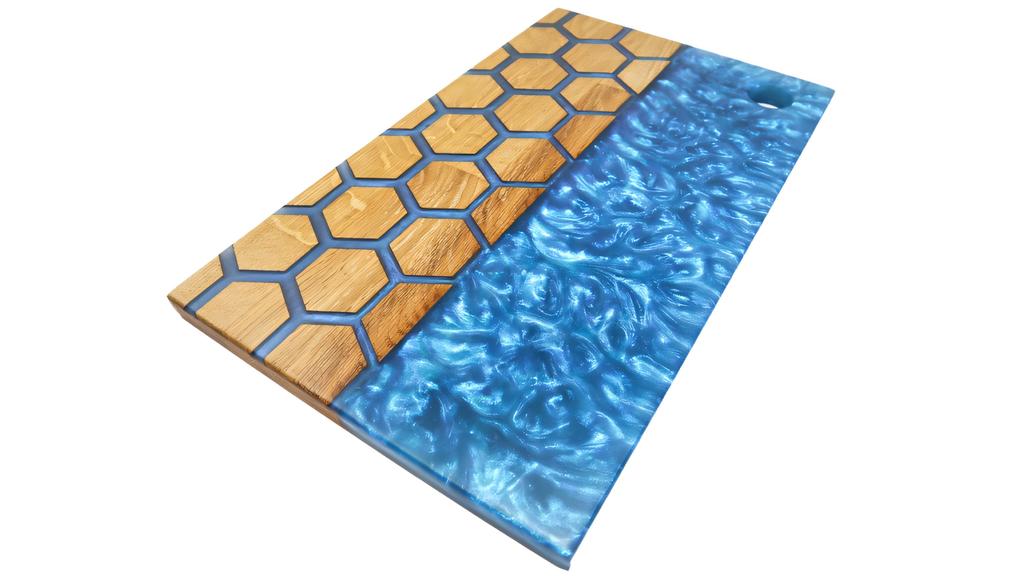
Creative work: colour pastes and colour pigments
Many smaller jewellery objects and handicrafts already develop a beautiful effect with clear, colourless epoxy resin. Even a rivertable with a transparent middle part made of resin can look very attractive, especially if you put pebbles or similar on the bottom of the 'river'.
However, if you want to add colour to your pieces, we also offer a versatile range of effect materials that are perfectly matched to Woodresin's epoxy resins. For example, there are colour pastes that can be used to colour the resin opaquely - and in a wide range of shades closely based on the RAL system. Alternatively, there are various liquid colour concentrates and the extremely colour-strong, highly pigmented alcohol inks with which you can colour the resin transparently.
Particularly striking effects can be achieved with Woodresin's colour pigments: Metallic and pearlescent effects, but also noctilucent colour pigments and those with colour changes in the resin(flip-flop effect).
Short instructions for building a Rivertable
There are many instructions on the internet, in magazines and books on how to make a so-called Rivertable. A rivertable is a table with an irregular band of epoxy resin running through the tabletop between two wooden planks, resembling a river. The following is not intended to replace these detailed instructions, but to give the beginner a first overview. In any case, the processing instructions of the resin manufacturer should be observed and followed exactly. Especially with regard to the mixing ratio and the drying and curing time, they are decisive and cannot be replaced by general information.
1. construction of the mould:
The first step in the production of a Rivertable is the construction of a mould, which consists of four side walls and a bottom. Usually coated chipboard is used for this, which is cut to size and screwed together. The joints must be sealed and a release agent applied to the inside of the mould. It is important to have a precise construction of the mould and to place it absolutely level before pouring the resin.
2. sealing:
The tabletop of a Rivertable is made of planks (often with a tree edge) and epoxy resin. The planks are usually sanded. However, they can also be left untreated if a rustic look is desired. In any case, the wood should be sealed with a thin layer of epoxy so that any escaping gases do not cause bubbles in the resin.
3. fixing the planks:
After sealing, the planks are fixed to the bottom of the mould. This is usually done by placing them in a thin layer of still liquid resin, which is poured onto the bottom. When this layer has dried, it holds the planks to the floor. In this way, the wood is prevented from rising upwards when the resin is poured into the mould.
4. pouring the resin:
After mixing the required amounts of resin and hardener together (be sure to follow the manufacturer's instructions) and adding effect agents as desired, pour the resin mixture into the mould. The maximum layer thickness must be observed. It may be necessary to pour in several layers. Again, follow the manufacturer's instructions. If the maximum thickness is exceeded, the resin may heat up excessively. The resulting bubbling and discolouration can undo all the painstaking preparatory work - the workpiece is spoilt.
5. stripping:
After the resin has cured , the tabletop is stripped: the screws are removed from the mould, the mould is dismantled and the blank is removed.
6. Surface finish:
Finally, the table top issanded, polished and cleaned to obtain a high-quality surface. The finished tabletop is then mounted on a purchased or self-made base frame . This should be suitably stable, as a top made of a strong plank and larger quantities of epoxy resin can weigh a considerable amount.