- Planing
Planing wood
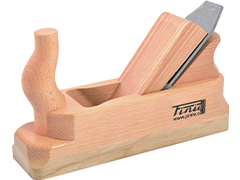
It is no coincidence that the plane is part of the carpenter's guild sign. It is an essential tool for any woodworker. It is used to prepare wooden surfaces, bring workpieces precisely to size and to cut rebates.
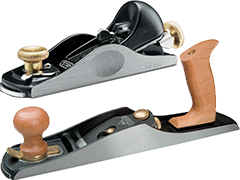
We offer traditional planes with a wooden body and metal planes, more common in English-speaking countries. In addition, we have stationary surface planers and thickness planers as well as electric hand planes from various proven manufacturers. Of course, you can also get the right replacement knives for electric planes from us.
The hand plane through the ages
The hand plane used to be one of the most important tools in carpentry and joinery - not for nothing is it one of the three tools depicted in the carpenters' guild sign. It also played a more or less important role in the other woodworking trades (for example, among carpenters, coopers and wheelwrights).
The carpenter and joiner once used the plane primarily for three areas of work:
- Levelling (finishing) wood, bringing it to size and dressing it at right angles,
- Cut joints and profiles and
- Plaster finished workpieces and smooth their surfaces
Today, power tools or machines are used for almost all these tasks in the commercial field for reasons of efficiency and speed. Many private users also tend to machine work for these reasons. However, there are also purists who strive to carry out all work that arises only with hand tools. But even if you mainly want to work with machines, you should still buy a minimum equipment of planes, because with them some jobs can be done easier and without major set-up work.
Plane wood by hand: the basic equipment
Almost all the hand planes mentioned below are available as metal planes and as wood planes. Both types have advantages and disadvantages, so deciding between them is basically a matter of personal likes and dislikes.
If you enjoy working with hand tools, consider the following planes for purchase:.
- Roughing plane and roughing bench for finishing, trimming to size and dressing raw wood.
- One-handed plane for finishing joints and planing end-grain.
- Plastering planes and double planes for finishing joints and surface treatment of hardwoods and softwoods respectively.
- Sim plane to cut rebates.
This is good basic equipment with which you can do most jobs that come up.
Minimal equipment as a supplement for planers.
If you would rather invest your money in machines, you should still purchase at least two planers: A one-handed plane and a plastering plane to rework joints or quickly chamfer an edge. If you buy an end-grain plane as a one-handed plane, you will also be able to cope with the otherwise somewhat difficult processing of end-grain wood, while the plaster plane also proves its worth when it comes to preparing surfaces for treatment with a finishing agent.
The right way to use a hand plane
You can only learn to plane with a hand plane by practising. However, there are some principles that you should keep in mind:
- The plane iron must always be well sharpened. Razor sharp!
- The workpiece must always be securely clamped. Rock solid!
- The chip you take off with the plane should usually be very thin. Wafer-thin!
Whenever possible, plane 'with the grain', i.e. not across the direction of the wood fibres and not against the grain. This principle is not as easy to teach theoretically as the previous three. The grain course may not be easy to recognise. It is best learned in practice, ideally under the guidance of an expert. This person will also teach you everything you need to know about body posture when planing and the exertion of pressure at the beginning and end of a planing stroke.
Machine planing
For the basic areas of woodworking mentioned above, power tools and machines are mostly used today instead of the hand plane.
- The raw wood is given two flat surfaces at right angles to each other with the planer. This used to be the job of the roughing plane or finishing plane and the roughing bench. If you do not want to buy a jointer or if you regularly process raw wood that exceeds this width, we recommend using a router together with a face milling device. With our sauter SlabMatrix, workpieces can not only be face milled, but also routed to format.
- The next step is to bring the wood to the desired thickness and width with the thickness planer. The roughing or finishing plane and the roughing bench were also once used for this. We offer Triton thickness planer and Makita thickness planer that can meet the demands of the small workshop but can also be used on the construction site.
- Like the hand plane, the electric plane is not used stationary, but is guided by hand. However, like the jointer and the thicknesser, it has a rotating cutter block with at least two planing knives instead of the plane iron. The electric planer is mainly used on the building site when planks or beams need to be quickly levelled or smoothed. It can also be used to cut rebates. Our range includes electric hand planers from the leading manufacturers Mafell, Bosch, Festool and Makita.
Please note that surface planers, thicknessers and electric hand planers deliver a surface quality that usually does not meet the requirements in furniture making. The surfaces are rather characterised by the so-called planing strokes, small 'waves'that hardly disturb wood construction and interior finishing as well as furniture components that are not visible. When it comes to high-quality furniture, these surfaces need to be refinished with a plaster plane and scraper or by manual or machine sanding before the surfacing agent is applied. Opinions differ as to whether sanding or hand planing is the better method of finishing the surface. Here you should make the decision based on your own experience, likes and dislikes.
The further processing steps (profiling, cutting joints, surface finishing) are nowadays not carried out with hand planes and planing machines, but with the router, the circular table saw or the sanding machine, so that the special planes used for this in the past have largely lost their purpose.
Planning wood-based panels
The previous illustration refers to the processing of solid wood. The differences between the rather soft softwood and the usually harder hardwood species play only a minor role. However, when it comes to planing wood-based panels, there are still a few special features to consider.
Special features for wood-based panels
The surfaces of raw particleboard (this also includes MDF and OSB boards) are not planed. If the surface quality is not sufficient (e.g. because you want to paint the board), you should sand it. The edges of coated boards can be planed if necessary, but you have to reckon with tears in the board as well as in the coating. For this reason, it is better to avoid planing and instead cut the board to the correct final size or apply glue around the cut edges.
Special features for veneered wood-based panels
Veneered wood-based panels are mainly offered as stick or block plywood ('blockboard'). For them, as for multiplex boards, their surfaces must be very carefully planed so as not to plane through the top layer of veneer. Here, too, sanding is the better method of processing (although due care must be taken here, too). The same applies to the edges as to coated wood-based panels.


